Perfect scone update – I found it!
Chocolate chip scones have pretty much replaced chocolate chip cookies as the thing my daughter Natalie and I bake together. This is a good thing, I believe, for several reasons. First, less sugar and fat. Second, much quicker and an easier clean up. Third, only one baking time, as opposed to cookies where it’s in and out, in and out, onto the cooling racks, and then we tend to burn half of them because we lose track of the time. Finally, we love to drink tea, and scones are pretty much perfect with tea, although they also pair quite nicely with a tall glass of cold milk.
Still, I am not entirely happy. For, although I have tried at least four different recipes, I have yet to make the perfect chocolate chip scone.
Last Saturday, because Irene and Marvin left behind some buttermilk on their recent visit, Natalie and I decided to try buttermilk scones. Here’s the recipe we used, barely modified from a very nice web site called Baking Sheet. The scones in the picture looked pretty perfect to me, and I liked that the recipe only makes 4-6 small scones. Although they apparently freeze well, scones are best eaten the day they are made, so a smaller quantity seemed better to me.
Buttermilk Scones
1 cup flour
1 tsp baking powder
¼ tsp baking soda
1/8 tsp salt
2 tbsp sugar
3 tbsp butter, cold and cut into small pieces
5 tbsp buttermilk
1 tsp vanilla
1/4 cup chocolate chips
For topping:
1 tbsp buttermilk
1 tbsp coarse sugar
Preheat oven to 400F. Line a baking sheet with parchment paper. In a large bowl, combine flour, baking powder, baking soda, salt and sugar and whisk to combine.

Rub butter into the flour mixture with your fingers or a pastry cutter until the mixture resembles very coarse meal.

Mix vanilla into buttermilk and add to the dry ingredients.


Add chocolate chips. Turn out dough onto lightly floured surface, knead a very little and form dough into a disc 1 inch thick. Cut the dough disk into 4-6 wedges using a knife or a pizza cutter.

Brush with 1 tbsp buttermilk

and sprinkle liberally with coarse sugar.

Place on baking sheet and bake at 400F for 15-18 minutes, or until lightly browned. Let cool for a few minutes before serving.
The end result, shown at the top of this post, was quite tasty. Everyone, including Natalie and her friend, enjoyed them immensely. But I was a bit disappointed in the texture. It wasn’t light enough, I thought. So, I decided to try again.
Most scone recipes I’d seen that originate in the UK called for Castor sugar, which is a very fine sugar. I figured that since scones originated in England, they might be onto something. I didn’t have any superfine sugar, but I read you can make your own using a food processor, so that’s what I did.
I also decided to add an egg to the recipe to see if that made a difference. Some scone recipes have an egg, others don’t. I wasn’t sure why, but I read in Harold McGee’s On Food and Cooking that in baking, eggs act as leavening agents because they expand while they cook.
So back I went to the kitchen, and whipped up another batch of scones using these two modifications – the superfine sugar and the egg. Confirming my belief about the superiority of scones over chocolate chip cookies, they were into the oven in less than 10 minutes. And here was the result:

Here are the results of the two recipes side by side (with egg on the left, without on the right):

To be honest, I really couldn’t see or taste much difference. My husband Paul thought the ones with an egg tasted better, but that may have been because they were still warm when he tried them. Don’t get me wrong. Both scones were quite tasty. But they were heavier than I’d like, and a little more cakelike than I expected. I decided to do a little more research into the scone-making process, so that I could better choose a recipe next time.
There are many scone recipes out there. What seems to be common in all of them is flour, leavening (baking powder, soda or both), sugar, butter and a liquid. According to the very well-written Joy of Baking Newletter on scones, the ratio of liquid to dry ingredients is 1:3. The liquid can be cream, milk, or buttermilk. Interestingly, eggs are not a consistent ingredient of scones.
According to the CIA’s The Professional Chef, one makes both scones and biscuits using a “rubbed dough” method, similar to that used in making pie crust. Dry ingredients are well-blended, either by sifting or whisking together. Shortening is chilled and then rubbed into the dry ingredients to create layers. The Professional Chef actually recommends putting the butter back into the fridge after cutting it up, so that it remains hard until you actually use it. It is extremely important not to let the fat melt and mix evenly into the rest of the ingredients; thus the liquid must also be very chilled.
The best results are achieved by working the dough as little as possible. This means that after adding the liquid, you only mix the dough enough so that it is a “shaggy mass”. Some recipes call for rolling and cutting the dough, but the traditional method for scones is to just knead the dough slightly, pat it into a flat circle and cut it into triangles.
As for the leavening agent, most recipes call for baking powder. When buttermilk is used, however, baking soda is also added. I did a little reading in McGee on the difference between baking powder and baking soda. Without getting too much into the chemistry, the acidity in the buttermilk causes the baking soda to react and start bubbling right away (I felt it as I was working the dough). The problem with baking soda is that the reaction is short-lived, and if you don’t work quickly enough after adding the liquid, is over before the real baking starts. Baking powder, especially double acting baking powder, has two different ingredients that have different rising reaction times. The first reaction occurs on addition of the baking powder to the batter, the other later on at higher temperatures that occur in the baking process. I also found that you can test your baking powder and soda for freshness. I did both, and mine were fine, so that wasn’t my problem.
So, now that I am an expert on scones and baking, I have the following insights into why the scones I made last Saturday were still a little far from perfect (though not that far…):
1. We didn’t have the butter or the buttermilk cold enough
2. We worked the dough just a little too much (I thought the “shaggy mass” was a shaggy mess and kept working the dough. Now I know that a shaggy mass is just what I am aiming for.)
3. I think we cut up our dough into too many scones, so they may have overcooked due to the higher ratio of surface area to middle.
4. I think more baking powder is called for. I’ve checked dozens of scone recipes. The ratios of flour to leavener vary greatly, but some definitely call for more that what I used.
I found a recipe that claims to be an “authentic” scone from Devon, England, and that calls for a full tbsp of baking powder plus 1/2 tsp soda per cup of flour! It will be the next recipe I try. I’ll let you know how it turns out.
In the meantime, if anyone has any better insights, or can help me out in finding the perfect recipe, please feel free to comment. Because I am definitely on a mission here.
Next : Still Searching for the Perfect Scone…
Caegory: Food
 I’m been driving my family crazy for the past month or so, as I try to get a great night shot of the Manhattan skyline for my blog banner. Of all the possible views of my fair city, I’ve decided to go for the view from Queens, because it’s the one that stirs my heart the most. You know the view if you’ve ever driven into Manhattan at night on the Long Island Expresswway. It hits you straight on, smack in the face, as you head over the last hill toward the Midtown Tunnel. Awesome.
 So far no one has hit us, and no cop has stopped us, but I get the feeling my days are numbered if I keep trying this approach. Plus, I can’t get the photo sharp enough because of the constant vibrations of the on ramp and the car. I’m afraid to get out and set up a tripod for fear someone will “clip me”. (That’s my Grandmother’s term for getting hit by a car).


 These are like samosas. They have a nice bite to them. Since the recipe itself was written as a single paragraph with ingredients in the sentences, and lacked basic intruction or an ingredient list, I’m re-writing it here the way I think Donna should have.
 The real star of this dish is the lemon salad, so I’m giving it it’s own photo. It is absolutely an amazing little side dish that I know I’ll be making again and again. You can really use any Asian spice rub on the fish. It’s the combo with the cucumber and the lemon salad that makes it special.


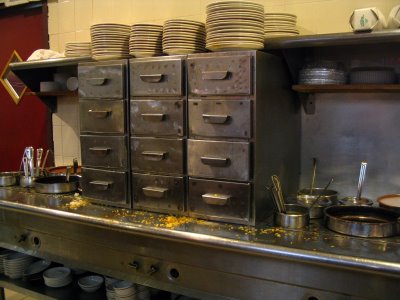
 Steam table, La Caridad Restaurant, 78th and Broadway